current location : home

9 Installation Considerations for Installing an Energy Storage System

 
When you purchase an energy storage system, few suppliers will tell you what to pay attention to during installation and use, especially when installing lithium battery clusters. Currently, the voltage of industrial and commercial energy storage battery clusters is typically above 500V. Improper installation and use can lead to serious consequences, such as short circuits, fires, electric shocks, and other hazards. We have also summarized the following key points to consider when installing lithium batteries.
 
1. Select the Appropriate Battery Specifications
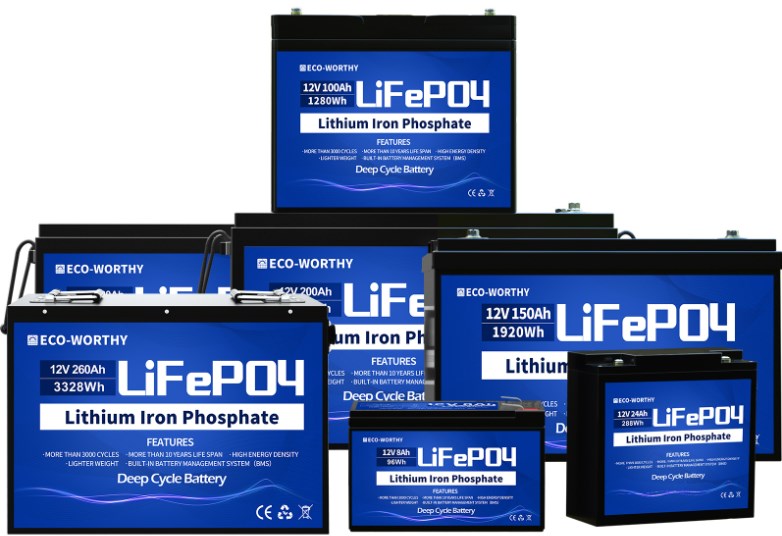
Choose a lithium battery pack with suitable capacity, voltage, and power according to actual needs, ensuring compatibility with other equipment. Because LiFePO4 is more stable and safer, energy storage batteries now choose LiFePO4.
 
2. Ensure Proper Heat Dissipation
Lithium batteries generate heat during charging and discharging. Ensure adequate ventilation and heat dissipation during installation to prevent the batteries from overheating.
 
3. Avoid Short Circuits and Incorrect Wiring
During installation, strictly follow the correct connection sequence of the battery’s positive and negative terminals to avoid short circuits and incorrect wiring, which could lead to battery damage or fire.
 
4. Keep the Environment Dry
Lithium batteries should be installed in a dry, moisture-free environment to prevent the batteries from becoming damp, reducing the risk of electrolyte leakage or short circuits.
 
5. Fire Safety Measures
In extreme conditions, lithium batteries may experience thermal runaway or even catch fire. Install necessary fire safety equipment, such as dry powder or CO2 extinguishers.
 
6. Avoid Mechanical Damage
During installation, avoid subjecting the batteries to impacts or punctures, as this could lead to internal short circuits or leaks, increasing the safety risk.
 
7. Regular Maintenance and Inspection
Regularly check the battery’s condition, including appearance, wiring, and voltage, ensuring it operates within normal parameters, and promptly address any abnormalities.
 
8. Compliant Installation and Operation
Strictly follow the manufacturer’s installation guidelines and operation manual to ensure the system complies with local electrical safety standards.
 
9. Storage and Transportation Precautions
When storing lithium batteries, avoid exposing them to high temperatures, direct sunlight, or flammable materials. During transportation, handle the batteries carefully to prevent damage to the casing.
 
If you have more interest about storage system, you can also consult us.
...

Introducing Solar Fence Kit Revolutionizing Security Systems

How can solar technology enhance the efficiency and effectiveness of fence systems? In this article, we uncover the innovation behind the solar fence kit, a game-changer in the realm of security systems. From solar project pole anchor wire mesh to PV fence panels, these advancements have transformed traditional fences into eco-friendly, smart solutions.

What is a Solar Fence Kit?

A solar fence kit is a comprehensive solution that combines solar technology with fence systems. It harnesses the power of the sun to ensure uninterrupted functionality, making it a sustainable and cost-effective alternative to traditional fences.

Solar Project Pole Anchor Wire Mesh

One key component of the solar fence kit is the solar project pole anchor wire mesh. This wire mesh contains embedded solar cells that absorb sunlight and convert it into electricity. The energy generated powers the fence system, eliminating the need for external power sources.

Solar Wire Mesh Fencing

Solar wire mesh fencing takes security to the next level. It combines the durability of wire mesh with the self-sufficiency of solar-powered systems, offering a reliable and eco-conscious solution. This type of fencing is ideal for various applications, including residential, commercial, and agricultural settings.

Solar Ground System Fence Panel

The solar ground system fence panel is another integral part of the solar fence kit. These panels are specifically designed to be mounted on the ground, capturing maximum sunlight exposure throughout the day. With their efficient energy conversion, they continuously power the fence system, ensuring consistent functionality even during power outages.

PV Fence Panel

PV fence panels, short for photovoltaic fence panels, are equipped with advanced solar cells. Built-in electronics efficiently harvest solar energy, converted into electricity to power the fence system effectively. These panels are not only aesthetically pleasing but also highly functional, blending seamlessly into any environment.

Benefits of a Solar Fence Kit

Integrating solar technology into fence systems offers several advantages:

  1. Energy Independence: By using solar power, the fence operates independently, reducing reliance on traditional power sources and lowering utility costs.

  2. Environmentally Friendly: Solar fence kits significantly reduce carbon emissions, making them a greener alternative to traditional systems.

  3. Cost-effective: With decreased energy expenditure and maintenance requirements, solar-powered fences offer long-term cost savings.

  4. Easy Installation: Solar fence kits are relatively easy to install, requiring minimal wiring and avoiding the need for trenching or extensive infrastructure.

  5. Enhanced Security: Solar fences provide reliable and uninterrupted security, ensuring protection even during power outages.

Conclusion

The introduction of solar fence kits has revolutionized security systems. The combination of solar project pole anchor wire mesh, solar wire mesh fencing, solar ground system fence panels, and PV fence panels offers improved efficiency, cost-effectiveness, and sustainability. By embracing solar technology, we can redefine the way we think about protecting our homes, businesses, and agricultural lands while reducing our environmental footprint. Invest in a solar fence kit today and embark on a secure and eco-friendly future!

...

The Introduction of Solar Mount Rail A Revolution in Solar Panel Installation

Solar power has become increasingly popular as a source of renewable energy. As more and more people adopt solar panels to meet their electricity needs, the need for efficient and reliable installation methods has become paramount. One crucial component in the solar panel installation process is the solar mount rail. In this article, we will explore the importance of solar panel roof rails, aluminum rails for solar panels, solar panel rail mounting kits, and PV rail mounting systems.

Why Solar Panel Roof Rails Matter

Solar panel roof rails are horizontal bars that provide stability and support for solar panels, ensuring they are securely fastened to the roof. These rails are typically made from durable materials such as aluminum, which offers excellent strength and corrosion resistance while being lightweight. The choice of the solar panel roof rail is vital as it determines the overall structural integrity and longevity of the solar panel system.

The Advantages of Aluminum Rail for Solar Panels

Aluminum rails have proven to be a popular choice for solar panel installations due to their numerous advantages. First and foremost, aluminum is lightweight, making it easier to handle during the installation process. Secondly, aluminum is highly resistant to corrosion, ensuring that the rail system remains intact and reliable even in harsh weather conditions. Additionally, aluminum is a sustainable material, as it can be recycled, reducing the environmental impact of solar installations.

Unleashing the Power of Solar Panel Rail Mounting Kits

Solar panel rail mounting kits are all-in-one solutions that include the necessary components for securely attaching solar panels to the roof. These kits typically include aluminum rails, clamps, and other mounting hardware. By using a rail mounting kit, solar panel installers can save time and effort in sourcing individual components. These kits are designed to be compatible with various roof types, ensuring a hassle-free installation process.

Enhancing Solar PV Installations with PV Rail Mounting Systems

PV rail mounting systems take solar panel installations to the next level by offering a comprehensive solution for both residential and commercial projects. These systems integrate multiple rails, connectors, and accessories to create a robust framework that supports the solar panels. PV rail mounting systems are highly versatile and can be customized to suit specific project requirements, ensuring a secure and efficient installation.

In conclusion, the introduction of solar mount rail has revolutionized solar panel installations. Whether it’s the use of solar panel roof rails, aluminum rails for solar panels, solar panel rail mounting kits, or PV rail mounting systems, these components play a critical role in ensuring the stability, longevity, and efficiency of solar panel systems. As the demand for renewable energy solutions continues to grow, the importance of reliable and efficient installation methods cannot be overstated. By embracing these innovative mounting solutions, we can harness the power of the sun and pave the way for a more sustainable future.

...

Step-by-Step Guide How to Use a Solar Mounting Panel Clamping Hook

Installing solar panels on your roof is a great way to harness clean energy and reduce your carbon footprint. To ensure a successful and secure installation, it’s important to use the right equipment, such as a solar mounting panel clamping hook. This handy device helps secure solar panels firmly to mounting rails, providing stability and durability, even in challenging weather conditions. In this step-by-step guide, we’ll walk you through the process of using a solar mounting panel clamping hook. Let’s get started!

Step 1: Gather the Required Tools and Materials

Before you begin, make sure you have all the necessary tools and materials at hand:

  • Solar mounting panel clamping hook

  • Mounting rails

  • Solar panels

  • Roof mounting brackets

  • Drill

  • Screws

  • Screwdriver

  • Tape measure

  • Pencil

Step 2: Prepare the Mounting Rails

Measure and mark the precise locations where you want to install your solar panels on the mounting rails. Ensure that the rails are secured properly to the roof using the roof mounting brackets. This will provide a sturdy foundation for the solar panels.

Step 3: Attach the Solar Panels to the Mounting Rails

Using the appropriate screws and a screwdriver, affix the solar panels onto the mounting rails. Ensure that the panels are aligned correctly and evenly spaced for optimal performance. Take care to tighten the screws securely but avoid over-tightening, as this may damage the panels.

Step 4: Position the Solar Mounting Panel Clamping Hooks

Place the solar mounting panel clamping hooks on the edges of the solar panels, aligning them with the mounting rails. The hooks should fit snugly and securely around the panels. Make sure to position the hooks evenly across the panels to distribute the weight evenly.

Step 5: Secure the Clamping Hooks

Using a screwdriver, tighten the clamping hooks onto the mounting rails. Ensure that the hooks grip the panels firmly without damaging them. Check for any movement or instability and adjust the hooks if necessary to achieve a secure connection.

Step 6: Test the Installation

Once all the clamping hooks are securely fastened, gently test the stability of the solar panels. Apply light pressure to ensure that the panels remain securely attached to the mounting rails. If there’s any movement or instability, recheck the attachments and make necessary adjustments.

Step 7: Final Checks

Once you’re satisfied with the installation, take a moment to inspect the entire setup. Ensure that all screws are tightened securely, and there are no loose connections. Verify that the solar panels are correctly positioned and aligned.

Congratulations! You have successfully installed your solar panels using a solar mounting panel clamping hook. Enjoy the benefits of renewable energy and do your part in preserving the environment!

Remember, if you’re unsure about any steps or encounter any difficulties during the installation process, it’s always recommended to consult a professional or seek assistance from a solar installation expert. Happy solar powering!

...

Shingled Technology All Black Solar Panels The Perfect Choice for Residential Solar Solutions

When it comes to harnessing the power of the sun for your home, there are several options available in the market. Among them, shingled solar panels have gained significant popularity due to their exceptional performance and sleek design. In this article, we will explore the advantages of shingled technology and discuss the benefits of all-black solar panels specifically designed for residential use.

Shingled Solar Panels: Revolutionizing Solar Energy

Shingled solar panels, also known as shingle-cell modules, represent the next generation of solar technology. Unlike traditional solar panels, which use full-sized solar cells, shingled panels are made up of smaller interlocked solar cells, resembling roof shingles. This innovative design not only enhances the panel’s efficiency but also improves its overall aesthetics.

The Advantages of Shingled Technology

  1. Increased Efficiency: Shingled solar panels utilize more space on the module, resulting in greater energy production compared to traditional solar panels. The interlocking design reduces the cell-to-cell distance, minimizing energy loss caused by shaded or inactive regions.

  2. Improved Durability: By eliminating the need for busbars, which are present in conventional solar panels, shingled technology reduces the vulnerability to cracking and cell failure. This makes the panels more resistant to extreme weather conditions, ensuring reliable performance over a long lifespan.

  3. Enhanced Aesthetics: With their sleek and uniform appearance, shingled solar panels blend seamlessly into residential settings. The absence of visible metal gridlines gives them a sophisticated all-black finish that enhances the overall curb appeal of your home.

Enter the All Black Shingled Solar Panels for Home Use

For those seeking not only performance but also an elegant aesthetic touch, all black shingled solar panels are the perfect choice. These modules feature a visually pleasing black monocrystalline design, specifically tailored for residential installations. With power outputs ranging from 420W to 430W, these high-efficiency panels provide substantial energy generation for powering your home.

Unleash the Power of the Sun on Your Rooftop

Installing shingled solar panels on your roof offers numerous benefits. Their lightweight nature and easy installation process make them an ideal choice for residential applications. With the ability to convert sunlight into clean energy, these panels help reduce your reliance on traditional power sources while making a positive impact on the environment.

Conclusion

Shingled technology has revolutionized the solar industry, offering increased efficiency, improved durability, and enhanced aesthetics. All black shingled solar panels provide an ideal solution for residential energy needs, combining performance with a stylish, monocrystalline design. By harnessing the power of the sun, you can not only save on electricity bills but also contribute to a sustainable future. Invest in shingled solar panels today and take a step towards a greener tomorrow.

...

A Beginner's Guide to Using the Higon Smart MPPT Controller 50A-60A for Off-Grid Solar Systems

Are you planning to set up an off-grid solar system? If so, you’re in the right place! In this guide, we’ll walk you through the step-by-step process of using the Higon Smart MPPT Controller 50A-60A. This smart controller ensures maximum efficiency and reliability, making it an excellent choice for your off-grid solar setup. Let’s get started!

Step 1: Familiarize Yourself with the Higon Smart MPPT Controller

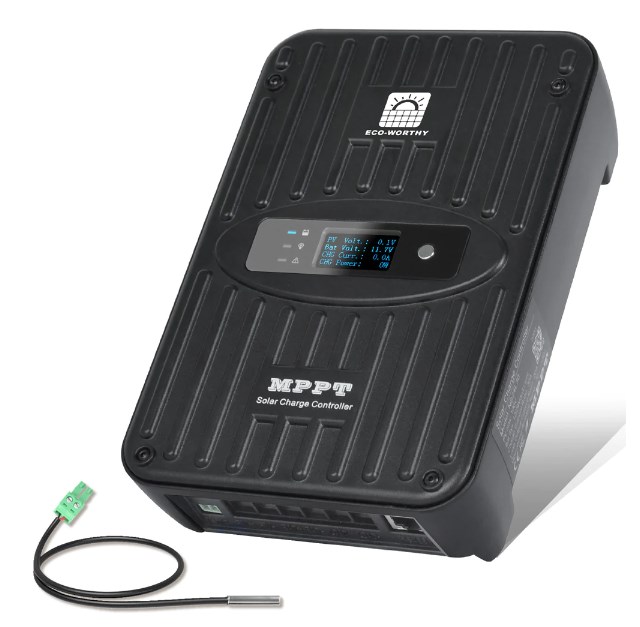
Before diving into the installation process, it’s important to understand the features and components of the Higon Smart MPPT Controller. The controller acts as an intelligent power-tracking device for photovoltaic systems, maximizing the energy conversion from solar panels to the batteries.

Step 2: Gather the Necessary Tools and Equipment

To install the Higon Smart MPPT Controller, make sure you have the following tools and equipment ready:

  • Screwdriver

  • Wire cutters and strippers

  • Electrical tape

  • Insulated cables

  • Multimeter (for voltage testing)

  • Solar panels and batteries (already in place)

Step 3: Ensure Proper Safety Precautions

Working with electricity requires safety measures. Before starting the installation process, ensure that you:

  • Turn off all connected devices and disconnect the battery.

  • Avoid working during rain or in wet conditions.

  • Wear safety gloves and goggles to protect yourself from potential electrical hazards.

Step 4: Connect the Solar Panels and Batteries

Begin by connecting the solar panels to the Higon Smart MPPT Controller. Follow these steps:

  1. Locate the positive (+) and negative (-) terminals on the solar panel array.

  2. Connect the positive wire from the solar panel to the positive terminal on the controller.

  3. Connect the negative wire from the solar panel to the negative terminal on the controller.

Next, connect the batteries to the controller:

  1. Identify the positive and negative terminals of the battery bank.

  2. Connect the positive wire from the battery bank to the positive terminal on the controller.

  3. Connect the negative wire from the battery bank to the negative terminal on the controller.

Step 5: Configure the Higon Smart MPPT Controller

Configure the Higon Smart MPPT Controller according to your system specifications:

  1. Turn on the controller by pressing the power button.

  2. Set the battery type (e.g., Lithium, Gel, Flooded) using the mode selector.

  3. Adjust the charging parameters (e.g., Float Voltage, Boost Voltage) to match the battery manufacturer’s recommendations.

  4. Set the load control parameters to manage the power output to your devices.

  5. Save the settings and exit the configuration mode.

Step 6: Monitor and Maintain Your System

Once the Higon Smart MPPT Controller is installed and configured, keep an eye on your off-grid solar system. Regularly monitor the controller’s display to ensure it is functioning properly. Conduct routine maintenance checks on the solar panels, batteries, and cables to identify any issues and address them promptly. This will help you maximize the efficiency and lifespan of your system.

Congratulations! By following these simple steps, you have successfully set up and utilized the Higon Smart MPPT Controller 50A-60A for your off-grid solar system. Enjoy the benefits of renewable energy and reduce your carbon footprint!

Remember, should you have any further questions or encounter difficulties during the installation process, always refer to the Higon Smart MPPT Controller’s user manual or contact their customer support for assistance. Happy solar powering!

...

Solar Panel Earthing Clip Is it Essential for Your Solar System?

Solar power is an increasingly popular choice for clean and sustainable energy generation. As homeowners and businesses embrace solar panels for their energy needs, it is crucial to ensure the safety and reliability of the system. One aspect that often goes overlooked is proper earthing or grounding of the solar panels. In this article, we will explore the importance of solar panel earthing clips and how they contribute to the overall performance and safety of your solar PV system.

Solar panels generate electricity by converting sunlight into usable energy. This process involves intricate electrical components and wiring, which must be handled and installed with utmost care. One critical element in this setup is proper earthing. Earthing refers to connecting electrical systems to the ground to prevent electric shock, fires, and equipment damage caused by electrical faults.

Solar panel earthing clips play a crucial role in the overall earthing system of your solar installation. These clips provide a reliable electrical connection between the solar panels and the grounding system of the building or structure. They are designed to securely bond the panels and other metal components of the photovoltaic system to the ground.

By efficiently conducting current to the ground, solar panel earthing clips help mitigate the risk of electrical faults. In the event of a fault or lightning strike, these clips provide a safe path for electrical energy to dissipate into the ground. This ensures that any excess current bypasses the electrical components, protecting them from damage and potential fire hazards.

Ensuring proper earthing of your solar system not only safeguards your investment but also protects the people living or working in the building. In the absence of a reliable earthing system, there can be a higher risk of electric shock for anyone coming into contact with the solar panels or associated equipment. This is especially important in areas with high lightning activity or unpredictable weather patterns.

Furthermore, some jurisdictions and electrical codes require the use of earthing clips in solar installations. Compliance with these regulations is vital to obtain permits and insurance coverage for your solar system. By using solar panel earthing clips, you demonstrate your commitment to safety and adherence to these guidelines.

While the benefits of solar energy are numerous, it is crucial not to overlook the importance of proper grounding and earthing. Solar panel earthing clips provide an efficient and reliable method to ensure proper earthing of your solar PV system. By investing in high-quality clips and following installation best practices, you can enhance the safety, reliability, and overall performance of your solar installation.

In conclusion, the answer to whether solar panel earthing clips are essential for your solar system is a resounding yes. These clips play a critical role in maintaining safety, protecting equipment, and meeting regulatory requirements. When it comes to your solar installation, don’t compromise on your safety or the longevity of your investment – choose solar panel earthing clips to secure a reliable and efficient grounding system for your solar panels.

Remember, investing in the right equipment and following proper installation guidelines are key to maximizing the benefits of your solar power system. Harnessing the power of the sun for a sustainable future starts with ensuring the safety and functionality of your solar panels through adequate earthing.

...

A Beginner's Guide to Using PD-RMS-SR Solar Metal Roof Railless Mounting Structure

Are you considering installing a solar power system on your roof? Look no further than the PD-RMS-SR Solar Metal Roof Railless Mounting Structure! This innovative and reliable system is designed to make the installation process easier and more efficient. In this beginner’s guide, we will walk you through the step-by-step process of using the PD-RMS-SR, ensuring a successful solar project.

Step 1: Assess Your Roof and Gather Information

Before starting the installation, it is crucial to gather relevant information about your roof. Determine the type of roofing material, its condition, and the available space for the solar panels. Take accurate measurements and note any obstructions such as chimneys or vents.

Step 2: Plan the Layout

Using the information gathered in step one, plan the layout of the solar panels on your roof. Consider factors such as optimal sun exposure, shading obstacles, and the direction and tilt of the panels. Ensure the layout maximizes energy production and adheres to local building codes and regulations.

Step 3: Prepare the PD-RMS-SR Components

Unbox and inspect the PD-RMS-SR mounting structure components. Familiarize yourself with each part and ensure nothing is damaged or missing. Refer to the manufacturer’s instructions for assembly details. It’s crucial to use all the specified components to ensure a secure and stable installation.

Step 4: Install the Mounting Structure

Begin by installing the PD-RMS-SR mounting structure on your roof. Lay out the mounting rails according to your planned layout. Attach the base brackets securely to the roof using the appropriate fasteners. Take extra care to seal any holes to prevent leaks. Follow the manufacturer’s instructions and guidelines to ensure proper alignment and spacing.

Step 5: Attach the Solar Panels

With the mounting structure securely in place, it’s time to attach the solar panels. Carefully position each panel on the mounting rails and secure them using the provided clamps or brackets. Ensure proper alignment and spacing between panels for optimal performance. Check for any potential shading issues and make necessary adjustments.

Step 6: Make Electrical Connections

Consult a qualified electrician to make the necessary electrical connections. Connect the solar panels to the inverter and route the wiring accordingly. Ensure all connections are secure and meet electrical safety requirements. Follow local regulations and obtain any necessary permits before proceeding.

Step 7: Perform a Final Check

Once the installation is complete, perform a thorough inspection of the entire system. Ensure all components are properly secured, and there are no loose connections. Double-check the alignment of the panels and verify the absence of shading issues. Testing the system’s functionality is highly recommended before connecting to the grid.

Congratulations! You have successfully installed your solar power system using the PD-RMS-SR Solar Metal Roof Railless Mounting Structure. By following these step-by-step instructions, you’ve taken a significant step towards harnessing clean and renewable energy.

Remember, if you ever need assistance or encounter any difficulties during the process, consult the manufacturer’s documentation or seek professional help. Enjoy the benefits of your solar power system and contribute to a greener future!

Note: This guide provides a general overview of the installation process using the PD-RMS-SR Solar Metal Roof Railless Mounting Structure. Always refer to the manufacturer’s specific instructions and guidelines for your particular system.

...

Exploring the Efficiency and Versatility of Ballasted Solar Mounting Systems

When it comes to installing solar panels on flat or low-slope roofs, ballasted mounting systems offer a practical and effective solution. These innovative systems, such as the Aluminum Ballasted System and the Ballasted PV Mounting System, provide a secure and versatile means of integrating solar into various roofing structures without the need for penetrating the surface.

Aluminum Ballasted System

The Aluminum Ballasted System is a popular choice for installing solar panels on flat roofs. This system utilizes lightweight aluminum racks that are secured in place using ballasts, which are typically made from concrete or gravel. The ballasts provide sufficient weight to keep the racks in position, ensuring stability even in challenging weather conditions.

One of the key advantages of the Aluminum Ballasted System is its ease of installation. Unlike traditional mounting systems that require roof penetrations, this system can be easily assembled and disassembled, minimizing any disruption to the roof’s integrity. Additionally, the adjustable tilt angle options allow for optimal alignment with the sun, maximizing the energy production of the solar panels.

Ballasted PV Mounting System

The Ballasted PV Mounting System is another excellent solution for roof installations. This system combines the advantages of ballast-based stability with a flexible and modular design, making it suitable for a wide range of roof types and layouts. The use of lightweight but durable materials, such as aluminum or stainless steel, ensures longevity while reducing the overall weight on the roof.

Similar to the Aluminum Ballasted System, the Ballasted PV Mounting System does not require roof penetrations. Instead, the specially designed racks use ballasts to secure the solar panels in place. This method eliminates the risk of water leaks and potential damage to the roof membrane, ensuring the roof’s integrity is maintained.

Solar Roof Mounting Ballasted System

For pitched and sloped roofs, the Solar Roof Mounting Ballasted System offers an efficient solution. This system utilizes innovative clamps or brackets that can be adjusted to fit various roof profiles, ensuring a secure and stable installation. The ballasts are strategically positioned to distribute weight evenly, preventing any concentrated pressure points on the roof surface.

The Solar Roof Mounting Ballasted System provides a seamless integration of solar panels onto pitched roofs, complementing the aesthetics of the building while maximizing energy generation. Its versatility allows for customization according to specific roof angles and architectural requirements, making it an ideal option for residential and commercial buildings alike.

Solar Ballasted Racking System

The Solar Ballasted Racking System is a comprehensive solution that can accommodate large-scale solar projects. Designed for ground-mount installations, this system employs ballasted racks to securely support an array of solar panels. The ballasts, typically made from concrete blocks, ensure stability and withstand environmental forces, such as wind and seismic events.

With its adaptable design, the Solar Ballasted Racking System can be tailored to specific site conditions and solar array orientations. This versatility enables efficient land utilization and maximizes energy production. Furthermore, the absence of ground penetration minimizes potential environmental impacts, making it an environmentally friendly choice for solar developments.

In conclusion, ballasted solar mounting systems, including the Aluminum Ballasted System, Ballasted PV Mounting System, Solar Roof Mounting Ballasted System, and Solar Ballasted Racking System, offer efficient and sustainable solutions for integrating solar panels on various roof and ground surfaces. These systems provide stability, versatility, and ease of installation, ensuring an optimized approach to solar energy utilization without compromising the integrity of the infrastructure. Embracing ballasted systems is a step towards a greener future and a more widespread adoption of renewable energy.

...

The Importance of Copper Ground Wires in Photovoltaic Solar Panel Connections

Copper is one of the most widely used materials in the electrical industry due to its excellent electrical conductivity and durability. When it comes to connecting ground wires in solar panel installations, copper proves to be an indispensable element. In this article, we will explore the significance of copper ground wires in photovoltaic solar panel connections and delve into the different types of copper wires available.

Solar panels harness the power of the sun to generate electricity, making them a sustainable and eco-friendly energy solution. To ensure optimal performance and safety, proper wiring and grounding are crucial. Copper ground wires play a vital role in this process, providing a safe pathway for electrical currents and protecting against potential harm.

One of the most important functions of copper ground wires is to safeguard against electrical faults and lightning strikes. In the event of a fault or surge, the copper ground wire diverts the excess electrical energy away from the solar panel system and into the ground, preventing damage to the equipment or even electrical fires.

There are various types of copper wires that are commonly used in solar panel installations. These include copper connecting ground wires, solar panel connecting wires, solar ground wires, and other related types. Each type is designed for specific purposes and must meet the necessary safety requirements and electrical codes.

When selecting copper wires for solar panel connections, it is essential to consider the gauge, or thickness, of the wire. The gauge determines the wire’s current-carrying capacity, with a lower gauge indicating a thicker wire that can handle higher currents. It is crucial to choose the appropriate gauge to avoid overheating and system inefficiencies.

In addition to the correct gauge, the connectors used to join the copper wires are equally important. Properly insulated and secure connectors ensure reliable connections and reduce the risk of loose or corroded wires, which can jeopardize system performance and safety. Copper ground wire connectors specifically designed for solar panels are widely available and should always be utilized for optimal protection.

In conclusion, copper ground wires are an integral part of effective solar panel connections. They provide a safe pathway for electrical currents, protect against electrical faults and lightning strikes, and contribute to the overall performance and longevity of the system. When installing solar panels, it is crucial to use quality copper wires and secure connectors to ensure both safety and efficiency.

...