current location : home

What You should Know About Building-integrated Photovoltaics(BIPV)?

What is BIPV?

Traditionally, solar is mounted on a building’s roof, referred to as building-applied PV. But more architects are learning how to also incorporate solar cells and modules into things like curtain walls, roof tiles and railings known as building integrated photovoltaics (BIPV).

A BIPV system consists of solar cells or modules that are integrated in building elements or material as part of the building structure. This way, they replace a conventional building element, rather than attaching to one. BIPV modules not only generate electricity, they can also provide added functionality to the building. For example, they can provide sun protection, thermal insulation, noise protection or safety.

Where can BIPV be installed?

BIPV provides several benefits when compared to traditional solar panels. First, there are more available surfaces for integrating the solar cells or modules — BIPV is not limited to roof integration. Solar modules can also be integrated into the building’s facade, skylights, railings and more. BIPV also adds to the aesthetics of the building. For example, the materials used for BIPV allow architects to play around with transparency and color. When integrated in ventilated facades, semi-transparent skylights or windows, BIPV can help keep the building cool.

What are the costs associated with BIPV?

In general, BIPV is more expensive than traditional PV systems used for solar power plants. There is some logic to this since the BIPV system has more functions than only delivering electrical power. However, because BIPV serves multiple functions in a building besides producing power, it may save material and installation cost.

What technologies are involved with BIPV?

The main solar cell technologies for BIPV are crystalline silicon solar cells, thin-film silicon solar cells and other thin-film technologies like organic solar cells (OPV) and dye sensitized solar cells (DSC). Crystalline silicon solar is the most mature technology, though thin-film technologies are grabbing a lot of attention because of their flexible character, ease of integration and better response to indirect light.

Organic solar cells are a relatively new technology that is still in the development phase. However, advantages of OPV can be that it’s a light-weight semi-transparent material, it can be coated inexpensively onto curved surfaces and onto glass, and it can be made in various colors or just color neutral. It also has a superior sensitivity to low light intensities, making the technology fit for maritime climates. Also, the technology is less dependent on the incident sunlight angle, which makes it ideal for aspects such as facade integration.

What is the outlook for the BIPV market?

BIPV is still a niche market, but architects are starting to use BIPV elements more frequently in the design of new public and office buildings. New net-zero energy buildings will help drive BIPV demand.

...

Why EL Testing of Solar Module is Important?


1. What is Electroluminescence(El) testing?
When current passes through solar PV cells, light emission occurs. This phenomenon is called Electroluminescence(EL). Testing of modules using this phenomenon can detect hidden defects in the structure of PV cells. This method makes the current distribution visible in the solar PV module and helps detect defects.

With the help of an EL test, a PV manufacturer can evaluate the structural quality of the PV cells or any other defects generated while handling.

Defects that can be found from EL are as given below:

  • Microcracks
  • Cell cracks
  • Soldering defects
  • PID defects
  • Diode failure
  • Dead cell
  • Backsheet scratches
  • Wafer defects


2. Defects & Impact of defects in a module identified by EL Image
A brief description on important of EL defects which may lead to performance failure is given as below

a) Microcracks
Microcracks can create an electrical separation, resulting in inactive cell part. Determining the power loss caused by microcracks is difficult. It can have varying to no effect at all. Microcracks in silicon wafers are minute cracks that appear as a result of damage during manufacture, shipping, installation, or operation.

How to prevent microcracks
To prevent solar microcracks, three areas must be addressed namely manufacturing, transportation, and environment. A solar panel manufacturer must acknowledge this preventive area.

The supplier should have the following:

  • A well-defined supply chain
  • A testing procedure that ensures each module receives EL testing
  • A strong reputation

How do microcracks occur
A major cause of microcracks is manufacturing defects. However, there are some natural environmental causes as well that cause microcracks, such as:

  • Thermal cycling (variation of temperature between night and day)
  • Humidity and freezing
  • Cyclic (or dynamic) pressure loads and wind loading
  • Heavy snowfall
  • Hail

Microcracks can occur during installation as well, due to variety of reasons, such as:

  • Stepping on modules or resting other equipment on modules
  • Bumping or dropping modules as they are lifted onto the roof
  • Installation on a nonplanar surface, which may cause twisting of the mounting frame and place stress on the module

Figure 1: Sample module with multiple micro-cracks

b) What are cell cracks?
Cell cracks cause isolation of region of cells. Cell cracks seem to be more severe, as current doesn’t pass through this area, and these may cause hot spots or thermal dissipations. When current passes through these hotspots, it heats the PV panel and starts damaging the panel. Hence it is necessary to identify these hotspots before they completely damage the panel.

Figure 2: Sample module with cell crack

c) Soldering defects
When the temperature during the soldering process isn’t high enough, cold soldering happens. The cold soldering interferes with the connection between the cell ribbon and the cell tab, preventing electricity from flowing and resulting in a loss of power production.

Due to its importance, solar module manufacturers frequently undertake EL testing twice during the manufacturing process.

If left unchecked, cold soldering can develop into hot spots, lowering the module’s power and causing a fire risk.

Figure 3: Sample module with soldering defects

d) Bypass Diode failure
When a bypass diode fails during the functioning of a module, one of the three cell strings is normally switched off. The outcome is a one-third reduction in output. Within the yield curve of a string, with good radiation conditions, a fall in yield of this magnitude and in numerous modules is frequently found. The essential interface for conducting electricity to the outside is a junction box at the back of a solar panel.

Figure 4: Sample module with diode failure

The bypass diodes inside the junction box enclosure can become short-circuited and burn out if water or dust penetrates the enclosure.

A burned bypass diode or connector might cause the panel to become an open circuit, preventing energy from being transferred forth. The bypass diode failure can be detected with help of EL. These modules should be replaced immediately to avoid junction-box burn or energy yield loss in the plant.

e) Potential Induced Degradation (PID)
Solar panels are typically connected in long series to generate a high system voltage, often exceeding 1000 V, which is used to power solar inverters.

Figure 5: Sample module with PID

The large voltage difference between the grounded frames and solar cells may be too much for low-quality solar cells to manage, causing them to fail. These defects can be identified with help of EL imaging.

f) Dead cells
Dead cells occur when a particular cell stops conducting current. Dead cells may be caused due to mechanical stress, which may have previously caused a cell crack in that area.


Figure 6: Sample module with Dead cell


3. When should a module get inspected for EL?
Now when someone is aware of the defects it is important to know when a module shall get inspected for EL.


a) During production, to check the cell quality of cells and module, and replace whenever required

Why this is important?

  • This will help the manufacturers to identify defects in the very first stage and avoid future loss due to batch rejection or warranty claims.
  • Benefits to manufacturer: Avoid rejection of batch supply


b) Third-party inspection by portable EL before dispatch.
This will prevent the dispatch of bad quality modules and reject batches before it reaches field.

Why this is important?

  • This will give confidence to the asset owners that the modules supplied are of good quality and future problems of module replacement due to manufacturing defects can be avoided.
  • Benefits to asset owners: Avoid rejection of batches or modules


c) Pre-installation EL test:
To check transportation and shipping damages. As we know, transportation on Indian roads can be a veritable roller-coaster. As solar modules are made of cells which are up to 100- 500µm, if modules are not handled properly during transportation or modules are not transported properly this may cause micro-cracks or cracks. It is also possible that the transport truck may get meet an accident in the way of transport, in this condition there is a high risk of broken and damaged modules.

Why this is important?

  • To claim transport insurance and get the damaged modules replaced.


d) After installation EL test:
Handling at the site may cause module failures during installation. If the modules are not handled properly while fixing or transporting within sites this may cause micro-cracks or module frame damages. Modules can also be dropped accidentally while movement within the site. These may cause cracks or micro-cracks or even breakage of modules. These defects can be identified from EL.

Why this is important?

  • EPC contractor may be held responsible for the damages and the modules might get replaced


e) To claim insurance from natural calamities like hailstorms, cyclones, heavy rains, floods etc. The expense of field EL testing is covered by insurance, and it allows you to protect yourself against future losses as a result of this incidence. While you wait for the power loss or hot spots caused by microcracks in the modules to occur, either the micro cracked modules will be replaced or the money will be kept in escrow.

Most crucially, without EL test data, it would be impossible to claim micro cracked PV modules later when power loss or hot patches become apparent. The window of opportunity for asset owners who wait a few years after the incident has occurred closes: Insurance policies specify a specific timeframe for reporting damage caused by force majeure events.


f) Before buying an Asset, before signing on an O&M contract, and for lenders before disbursement

  • Before buying an asset knowing the performance of the plant is important. An EL can help in identifying the defects and protecting new owners from potential revenue loss.
  • An O&M contractor can always mitigate the risks by knowing the plant and module health and bidding for a PR suitably, so that performance loss LD, due to a factor not under their control, is avoided.
  • For lenders, it is important to know the module health before investing. Hence an EL image of the module can predict the current quality of modules at the site.


4. Impact of Defects if not detected?
It is known that the power of the solar panel decreases with an increase in temperature. The crack in a module caused power dissipation at the inactive cell area, as it limits the current passage through the inactive area thus causing higher temperature at the impacted area. In the Indian climate where the module temperature ranges from 35 degrees to 45 degrees Celsius on average, a higher temperature at an inactive area will further cause a reduction in output.

Consider the following possible scenario of a 100MW plant with 350 Wp with 285714 panels in the field.

  • Scenario A: Degradation of 5% panel is 1.18% instead of 0.7% due to inactive area in cells (dead cell)
  • Scenario B: Degradation of 10% panel is 0.9% instead of 0.7% due to cracks or inactive area due to soldering defects.
  • Scenario C: 10% of panels are affected with PID with approximately 5% degradation instead of 0.7%
  • In the above scenario, a 100 MW plant will produce only 99.51 MW if few EL defects are left unnoticed.
  • There would be a loss of 8.48 lakhs unit loss in a year which may cost around Rs 40 lakhs loss per annum.
  • If the above defects are detected, one can claim for warranty, based on defects, and consider the defects in Energy yield calculation to minimize PR guarantee loss.
  • If the defects are not identified this may cause further damage to panels and loss may increase every year.


5) Conclusion
In this paper, the types of defects in a solar module, the requirement of the EL test, and the impact of the EL test if not done were discussed. It was described that cracks, micro-cracks, dead cells can cause hotspots in a module which may further degrade the module and may constrain the pre-mature aging of solar plants. This paper described that what is the potential gain of performing an EL test at different stages of the module life cycle and a brief description with all perspectives was given. The impact on energy loss due to undetected EL failure was discussed.


...
Why Solar Carport is Cool Solar Solution?

A solar carport is a photon-capturing canopy covering a parking area. While they have some things in common with traditional carports and ground-mounted solar arrays, solar carports have distinct advantages over both.

Any PV contractors looking to expand their reach and grow their operations should consider adding solar carports to their list of installation services. The market is already huge. And with PV panel prices trending downwards and electric vehicle (EV) sales on the rise, demand for solar carports will only increase in the years to come.

This article explains what solar carports are, how they work and why they’re becoming more popular.

What Is A Solar Carport?


A solar carport is a covered parking area with a canopy made from PV panels. Sometimes these carports are designed for a single parking spot – like in residential driveways. Other times, they might be strung together in a series to cover entire commercial parking lots.

Either way, solar carport owners benefit from cheaper and cleaner electricity, while also providing shade and protection for their vehicles.

How Does A Solar Carport Work?

Unlike with traditional PV installations attached to rooftops, ground-mounted PV systems rely on tilted panels installed several feet off the ground.

Solar carport structures use a ground-mounted model – except that the PV panels are installed even higher off the ground to provide enough clearance for parked vehicles. Many solar carports also come with in-built electric vehicle (EV) charging stations so that drivers can top up their batteries when not using their cars.

How Much Does A Solar Carport Cost?

A standard solar carport system costs about $3.45 per watt, with the bulk of these expenses going to:

  • The panels themselves, which range from $16,000 to $18,000 on average for a 5kW system
  • The solar carport structure used to support the PV panels costs around $2,500
  • The labor, wiring and other components that round out the system

While these are rough averages, there are several different factors that might influence the total cost of a solar panel carport. For example, commercial installations tend to be somewhat cheaper per watt due to economies of scale. With current PV panel prices, for example, a business owner should budget closer to $3.45 per watt. By contrast, residential solar carports hover closer to the $4 per watt range on average.

Either way, solar carports are technically more expensive than their rooftop counterparts are, with a traditional residential PV system costing as little as $2.81 per watt to install. However, not every home or commercial property is suited for rooftop solar due to any number of factors, including:

  • Excessive shading
  • Chimneys, vents, and gables
  • Limited rooftop space
  • Incorrect orientation

For those with large enough yards, ground-mounted solar is often an attractive option, with prices hovering in the $3.11 per watt range.

Despite their higher costs, however, solar panel carports provide a host of advantages over rooftop and ground-mounted PV systems.

The Benefits Of Solar Carports

Below are just some of the reasons commercial and residential solar carports are increasingly in demand.

1. Reduced Energy Expenses

Solar canopies represent an easy way to turn unused surface areas into mini power plants. Just as with rooftop and ground-mounted solar installations, clients can generate their own clean electricity on-site instead of buying power from the utility company. As a result, solar carport owners benefit from monthly savings – not to mention smaller carbon footprints. Better still, their energy costs stay constant since sunshine remains the same price forever (free).

With enough installed capacity, users can even sell excess solar energy back to their utility providers under incentive programs like net energy metering.

2. More Efficient Use Of Space

Ground-mounted solar installations take up valuable real estate, with the space underneath not providing much benefit. Similarly, the average parking lot isn’t terribly productive (even when cars are parked there).

Solar carports offer the best of both worlds – allowing users to optimize limited real estate by transforming unproductive parking spots into renewable energy-generation machines.

3. Protection From The Elements

In addition to generating cheaper and cleaner electricity for their owners, solar carports also provide protection from the elements:

  • On the hottest days of the year, solar carports help shade vehicles – resulting in more comfortable commutes for their drivers
  • Solar carports provide protection from rain, sleet, and snow – helping to prolong the useful lifetimes of the vehicles underneath
4. EV-Charging

This is a relatively recent benefit. But solar carports can be integrated with EV-charging solutions:

  • Homeowners enjoy peace of mind in knowing that their electric vehicles have fuller batteries whenever they leave their houses
  • Business owners who install solar carports with chargers give EV drivers another reason to walk through the door
5. More Power Generation

Although solar carports carry a higher price tag, they are simpler to manipulate and optimize than traditional rooftop PV systems. It’s much easier to reorient a parking spot than it is to reposition an entire roof. And this allows installers to orient their clients’ carports in the optimal direction to maximize sun capture – and by extension, solar power generation, carbon offsets, and monthly savings.

Is A Solar Panel Carport Right For Your Clients?

Solar carports aren’t for everyone. And your own clients may be better off with a conventional rooftop solar installation, provided their home or business has sufficient space and the right orientation.

However, solar carports are an increasingly affordable option that delivers many important benefits. And with demand on the rise, adding solar carports to your renewable energy services is a great way to attract more business and future-proof your operations.

...

How Does Solar System Works?

Bring you a simplified explanation of how a solar system works:


When sunlight falls on the solar panels, the panels' cells absorb these photons, Within the solar panels, the conductor silicon converts the absorbed photons into electrons. This process is known as the photovoltaic effect.


The solar panels produce direct current (DC) electricity, which is a type of electrical current that flows in one direction.


The DC electricity generated by the panels is sent to an inverter. The inverter converts the DC electricity into alternating current (AC), which is the type of electricity used in homes and businesses.


The AC electricity produced by the inverter can now be used to power electrical devices and appliances, or it can be fed into the electrical grid for credit or sale to the utility company.


In some regions, homes and businesses with solar systems can take advantage of net metering. Net metering allows the excess electricity generated by the solar system to be sent back to the grid, and the owner receives credits for the electricity produced. These credits can be used when the solar system is not generating enough electricity, such as during nighttime or cloudy days.


Overall, a solar system allows individuals and businesses to harness the clean, renewable energy of the sun to offset their electricity consumption, reduce their carbon footprint, and save money on utility bills over time.

...

How to choose electric vehicle charger interface In 2025?

Electric vehicle charger interface instruction


Electric Vehicle (EV) charger have become increasingly essential as the adoption of electric vehicles continues to rise globally. However, one of the challenges in the widespread deployment of EV charging infrastructure is the difference in charging connectors and interfaces across countries. These differences have been shaped by regional standards, technological advancements, and local regulations.


In Europe, the most commonly used charging interface is the Type 2 connector, which is defined by the European standard IEC 62196. It supports both AC (alternating current) and DC (direct current) charging. Type 2 is preferred because of its fast charging capabilities and safety features, and it is mandated for all public charging stations in the EU. For fast charging, the CCS2 (Combined Charging System 2) connector is widely used, combining both AC and DC charging in a single system.


In the United States, the dominant standard is the SAE J1772 connector, used for AC charging. For DC fast charging, the CCS1 connector is employed, which, like CCS2, supports both AC and DC charging, but it is designed with different pin configurations. Tesla vehicles in the U.S. use a proprietary connector, though they also support the J1772 and CCS1 standards through adapters.


China has developed its own standard, the GB/T connector. The GB/T 20234 standard is used for both AC and DC charging, and it is the primary connector type in China. Unlike the international standards, the Chinese system is not fully compatible with European or U.S. systems, necessitating adapters or additional infrastructure for international users.


In conclusion, the diversity of EV charging connectors across the globe highlights the need for interoperability solutions, such as universal adapters or standardized charging protocols, to make cross-border EV travel seamless and efficient.


...

A Beginner's Guide to Installing the PandaSolar Anodized Aluminum Solar Rail Roof Mounting Racking Structure

If you’re looking to harness the power of the sun and save on your energy bills, installing a solar panel system is a smart choice. And when it comes to ensuring a sturdy and secure installation, the PandaSolar Anodized Aluminum Solar Rail Roof Mounting Racking Structure is an excellent option for both residential and commercial rooftops. In this step-by-step guide, we’ll walk you through the process of installing this reliable and durable mounting bracket.

Step 1: Gather the Necessary Tools and Equipment

Before you begin the installation process, make sure you have all the required tools and equipment. You will need:

  1. Drill

  2. Screwdriver

  3. Measuring tape

  4. Level

  5. Roof anchor set or roof flashing

  6. Stainless steel screws

  7. L-foot bracket

  8. Solar panel clamps

  9. End clamps

  10. Mid clamps

  11. Rail connector

  12. Anodized aluminum solar rail

Step 2: Assess Your Roof’s Structure

Before installing the mounting bracket, it’s essential to evaluate your roof’s structure. Ensure that the surface is free from any damage and can support the weight of the solar panel system. If you have any concerns about your roof’s integrity, it’s recommended to consult a professional before proceeding.

Step 3: Determine the Optimal Panel Layout

Now, it’s time to plan where you want to position the solar panels. Consider factors such as sun exposure, potential obstructions (like nearby trees or buildings), and applicable local regulations. This step will help you determine the number of mounting brackets and rails you’ll need for your installation.

Step 4: Install the Roof Anchors or Roof Flashing

To securely fasten the mounting bracket to your roof, you’ll need to install roof anchors or roof flashing. Follow the manufacturer’s instructions and use appropriate sealants to prevent any leaks and ensure a watertight seal.

Step 5: Attach the L-Foot Bracket

Place the L-foot bracket on top of the roof anchor or roof flashing and align it with the correct position for your solar panels. Use stainless steel screws to secure it into place. Make sure the bracket is level and tightly attached to the roof.

Step 6: Install the Solar Rails

Connect the solar rails using rail connectors to create a continuous rail system. Attach the rails to the L-foot brackets using screws, ensuring they are parallel and properly aligned. Use a level to ensure the rails are perfectly horizontal.

Step 7: Attach the Solar Panel Clamps

Now it’s time to attach the solar panels. Position the panels on the rails, sliding them into place. Secure the panels using solar panel clamps. Make sure the clamps are evenly spaced and properly tightened to prevent any movement.

Step 8: Install the End and Mid Clamps

Attach end clamps and mid clamps to the solar panels, securing them to the rails. Ensure the panels fit securely in place and are aligned properly.

Step 9: Perform a Thorough Inspection

Once the installation is complete, perform a thorough inspection to ensure everything is properly installed and secure. Check all connections, clamps, and fasteners to confirm they are tightened correctly.

Congratulations! You have successfully installed the PandaSolar Anodized Aluminum Solar Rail Roof Mounting Racking Structure. Enjoy the benefits of harnessing solar power and reducing your carbon footprint.

Remember, if you’re unsure about any step or lack the necessary expertise, it’s always a good idea to consult a professional solar panel installer to ensure a safe and efficient installation.

...

Mibet Showcases Solar Mounting at All-Energy Australia 2024

The Australian Energy Show is the largest local renewable energy exhibition, which takes place each October in Melbourne. Established in 2015 through the merger of All-Energy Australia and Clean Energy Week, the exhibition focuses on PV and solar thermal technologies. It provides a fantastic opportunity to discover new product releases and connect with industry experts from around the world.

solar mounting system company

Mibetsolar is thrilled to participate in the 2024 show in Melbourne on October 23-24. We invite you to visit booth K131 to learn about our solar mounting system solutions that support Australia's energy transition.

We design and manufacture solar racking for commercial and utility-scale projects, including ground solar mounting system, solar floating system, solar carport system, metal roof solar clamps, and ballasted mounting system. Our design team provides complete project renderings for a clear preview of your project. Contact us directly for a quote on your next utility-scale solar project.

...

\"Mibet at All-Energy Australia 2024 Showcasing Solar Solutions\

From October 23-24, All-Energy Australia 2024 was held at the Melbourne Convention and Exhibition Centre, showcasing clean and renewable energy technologies. Mibetsolar featured a range of solar mounting systems at booth K131, offering project solutions for various application scenarios.

Mibet at All-Energy Australia 2024: Showcasing Solar Solutions

Our display of mounting brackets and systems includes floating solar systems (G5M), ground-mounted systems (GT7), solar carports, and brackets, hooks, and clamps suitable for different roof types.

Mibet at All-Energy Australia 2024: Showcasing Solar Solutions

Mibet is committed to supporting the growth of the Australian solar market. Having successfully participated in All-Energy Australia 2024, we look forward to continuing to provide innovative solutions and expert support to our customers and partners across the world.

...

Lead-Acid Batteries The Ideal Choice for Backup Power in Smart Toilets

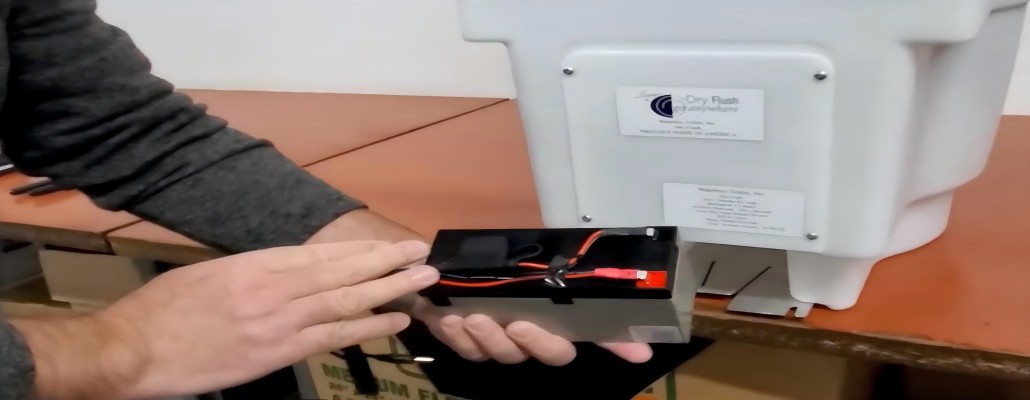
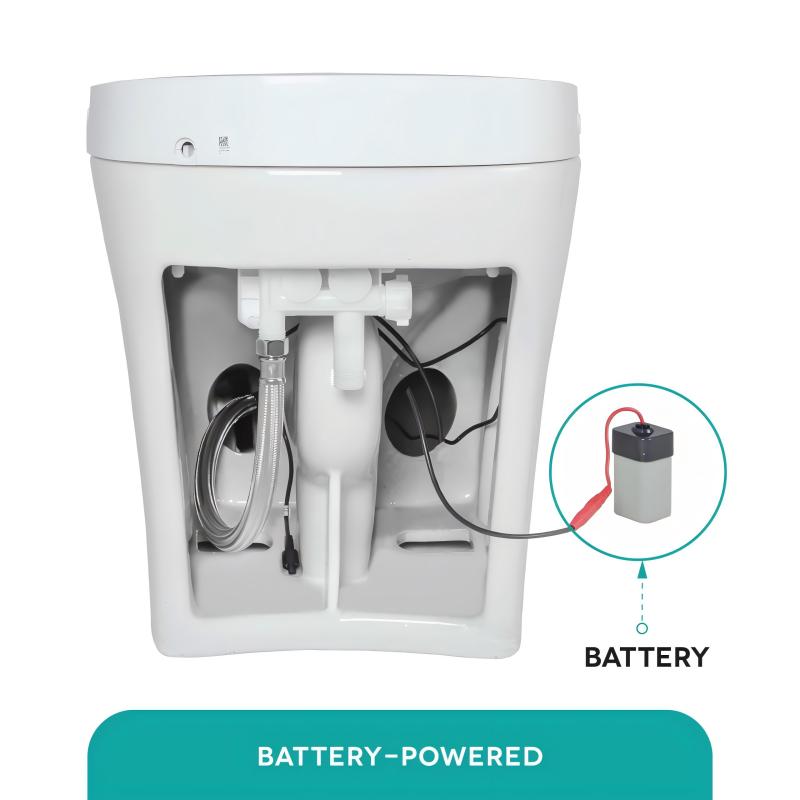
In modern home life, smart toilets have gradually become a standard fixture in the bathroom for their automation and comfort. However, unstable power supplies can affect the user experience of these intelligent devices. To ensure that basic functions such as automatic flushing and seat heating continue to work during power outages or other electrical issues, lead-acid batteries are increasingly favored as a reliable backup power solution.


toilet aid battery


Battery Compatibility: Meeting the Electrical Needs of Smart Toilets

When selecting a lead-acid battery as a backup power source for a smart toilet, it's crucial to ensure that the battery's voltage and current match the electrical parameters of the toilet. For instance, some smart toilets may require a DC 6V4.5Ah lead-acid battery, 12V7Ah lead acid battery to operate normally. Proper battery matching ensures that the toilet's electronic system can switch seamlessly to the backup power when the main power fails, maintaining normal operation.


Installation and Maintenance: Ensuring Stable Battery Operation

When installing a lead-acid battery, consider the battery's location to ensure there is enough space for maintenance and replacement, and to prevent physical damage from impacts. Regularly check the battery terminals to prevent corrosion and loosening, ensuring stable power supply.


Safety and Charging: Protecting the Battery and Users

Safety is the primary concern when handling lead-acid batteries. Wear appropriate protective gear, such as rubber gloves and safety goggles, to prevent sulfuric acid from splashing onto skin or eyes. Store batteries in a dry, well-ventilated environment, avoiding high temperatures and humidity to reduce safety risks. Additionally, lead-acid batteries need regular charging to maintain performance. The charging equipment must be compatible with the battery and follow the correct charging procedures to avoid overcharging or undercharging.


Fault Detection and Warranty: Extending Battery Life

If a smart toilet fails to power on, first check if the battery has enough charge. If the battery is sufficiently charged, it may be necessary to inspect the battery connections or the toilet's electrical system. Understanding the battery's warranty policy and replacement cycle helps to replace the battery in time when its performance declines, extending the lifespan of the smart toilet.


Environmental Disposal: Responsible Battery Recycling
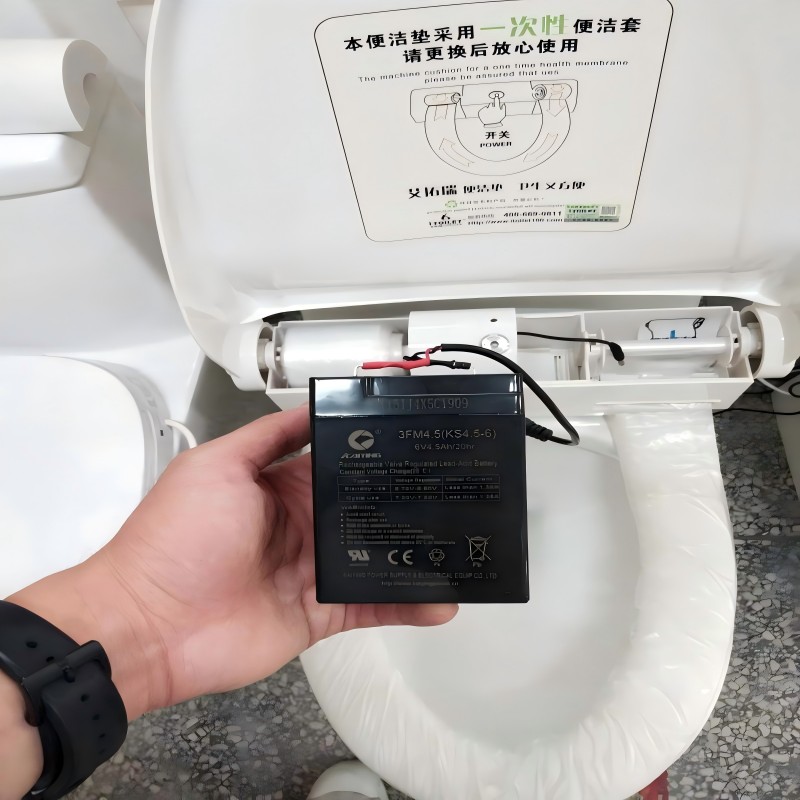
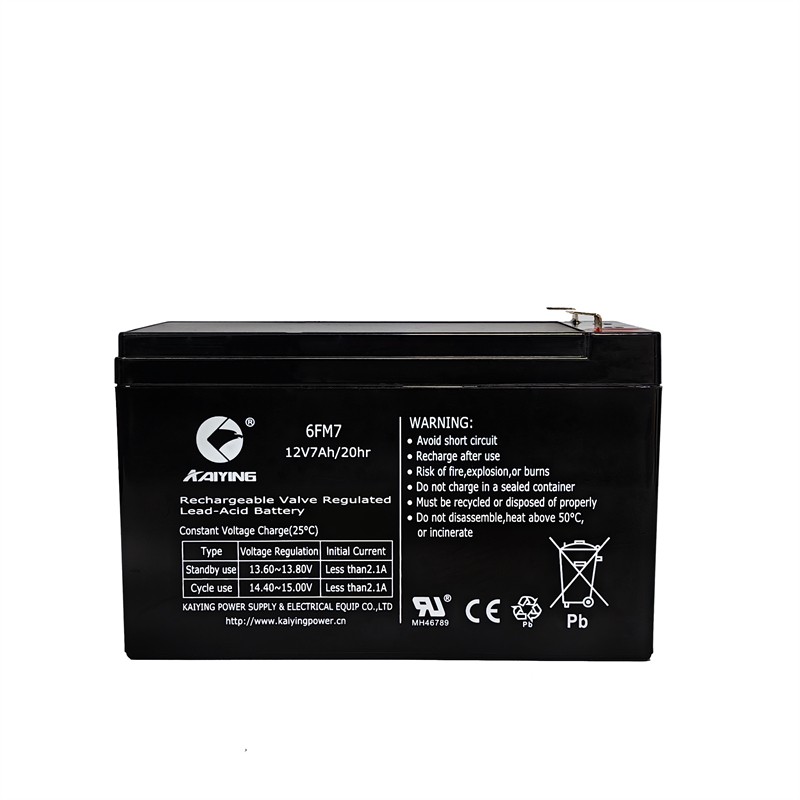
Lead-acid batteries contain lead and other harmful substances, so they need to be recycled and disposed of according to local regulations to prevent environmental pollution. This is not only a responsibility to the environment but also a protection of user health.


In summary, sla batteries are an ideal choice for backup power in smart toilets due to their strong current discharge performance and stable voltage characteristics. With the right selection, installation, maintenance, and safe use, lead-acid batteries can provide users with a reliable, safe, and environmentally friendly smart toilet experience, kaiyingpower is a professional lead-acid battery manufacturer,get more details from us quickly!.


  • smart toilet battery
     
  • smart toilet battery operated
     
  • 12V battery replacement
     
...

Maintenance and Care for Maintenance-Free Lead-Acid Motorcycle Batteries

Maintenance-free lead-acid batteries are popular in motorcycles due to their convenience and long lifespan. However, even though they are called "maintenance-free," proper care is still essential to ensure optimal performance and extend the battery's life. This article will guide you through the correct maintenance strategies for these batteries.

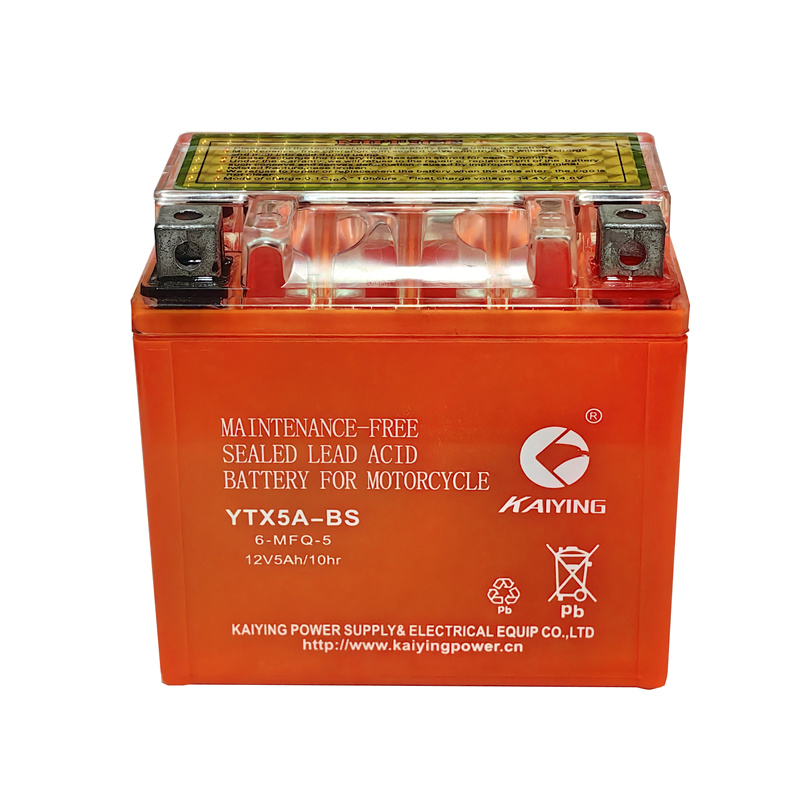
  • YTX5A-BS Lead-Acid Battery
          Battery YTX5A-BS
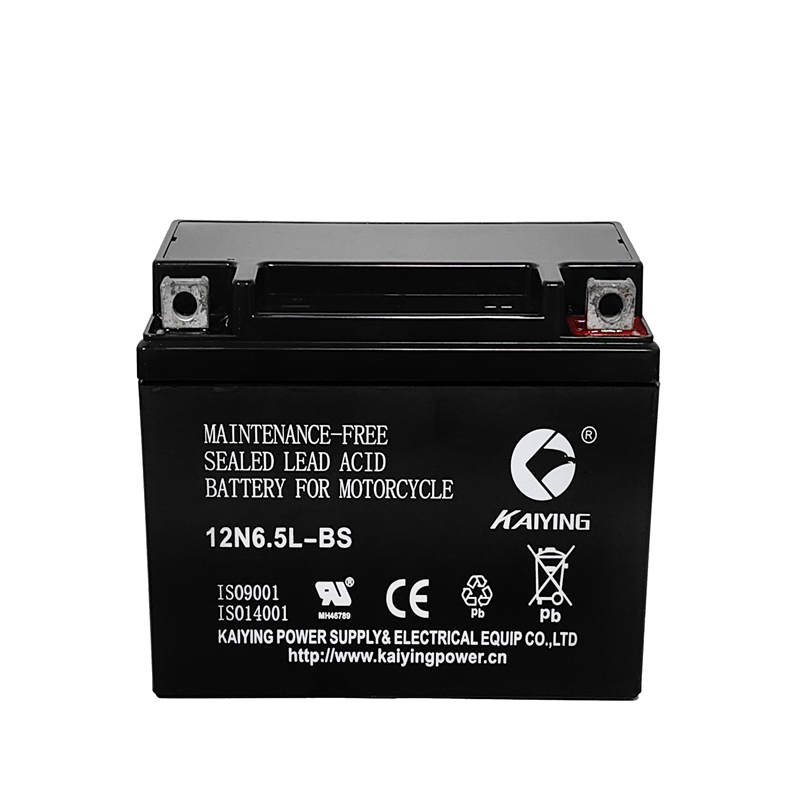
  • 12N6.5L-BS Lead-Acid Battery
         Battery 12N6.5L-BS
  • 12N9L-BS Lead-Acid Battery
           Battery 12N9L-BS
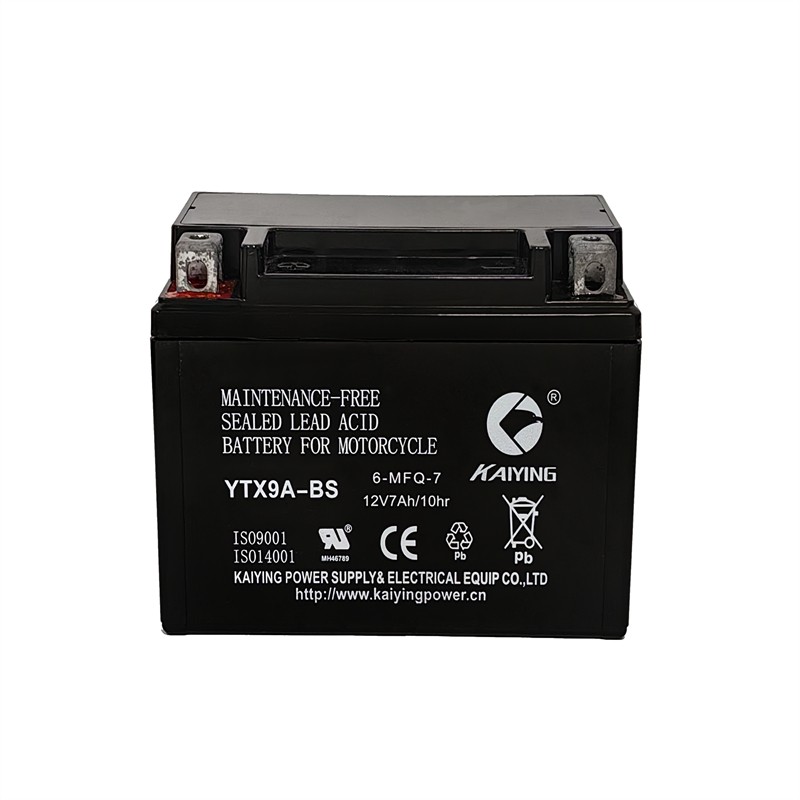
  • YTX9A-BS Lead-Acid Battery
          Battery YTX9A-BS
 

Understanding Maintenance-Free Lead-Acid Batteries


Maintenance-free lead-acid batteries use lead-calcium alloy grids, which significantly reduce water loss during use, making the battery less demanding in terms of upkeep. The electrolyte is sealed inside the battery, so users cannot and do not need to add liquid. However, this does not mean the battery requires no care at all. By using and maintaining it properly, you can greatly extend its lifespan and keep it performing well throughout its life cycle.


Maintenance and Care Strategies


1. Regular Inspection and Voltage Monitoring

Although you can’t add liquid or open the battery, it’s still crucial to regularly inspect the battery’s appearance and performance. Look for signs like swelling, leaks, or damage to the casing, as these could indicate potential issues. It’s also important to monitor the battery’s voltage regularly using a voltmeter. A fully charged AGM motorcycle battery should show a voltage between 12.6 and 12.8 volts. If the voltage is lower, the battery might need charging or have other problems.


2. Charging Management and Preventing Deep Discharge

Proper charging management is key to extending battery life. Using a smart charger can automatically adjust the charging current and voltage based on the battery’s condition, preventing overcharging. At the same time, deep discharges can greatly shorten the battery’s lifespan. To avoid this, it’s advisable to disconnect the battery or use a maintenance charger if the motorcycle won’t be used for an extended period, keeping the battery in good condition.


3. Environmental Control and Good Usage Habits

The environment has a big impact on battery performance. Extreme temperatures can harm the chemical reactions inside the battery, shortening its lifespan. So, it’s important to store the powersports battery in a suitable, dry place. Additionally, good usage habits, like avoiding frequent short trips, help reduce unnecessary charging cycles and slow down the aging process of the battery.


Technical Maintenance and Professional Support


1. Replacement Batteries and Professional Service

When the battery’s performance drops significantly, it’s better to replace it with a new one rather than trying to repair it yourself. The sealed design of maintenance-free batteries makes repairs difficult, so replacing the battery is a safer and more reliable choice. For deep inspections or internal issues, it’s best to seek help from professional service providers to ensure the battery’s safety and performance.


2. Installing a Battery Management System (BMS) and Learning Maintenance Skills

A Battery Management System (BMS) can monitor the battery’s status in real time, providing protection and optimizing the charging and discharging process, which improves overall performance and extends the battery’s life. Users should also learn proper maintenance skills and understand the correct way to use a maintenance-free lead-acid battery to avoid damage caused by improper handling.


While maintenance-free lead-acid batteries require less upkeep than traditional batteries, they still need proper care. By regularly inspecting the battery, monitoring its voltage, managing charging, controlling the environment, and developing good usage habits, you can greatly extend the battery’s life. Additionally, replacing batteries when needed, seeking professional support, and installing a BMS are effective ways to ensure the battery’s safety and performance. Following these maintenance strategies will help keep your motorcycle battery in top condition, providing reliable power for a long time. Kaiyingpower is a professional lead-acid battery manufacturer, get more details from us quickly! 

...